Steps to Filter Reports:
-
Access the Reporting Module:
- Log into your Minga account.
- Head to the module you want to report on from the main dashboard and click the Reports tab
-
Select Filters:
- Pick the filters you need from the available options, like class, grade, or custom groups.
- You can apply multiple filters to narrow down your report data to exactly what you need.

-
Click Apply filters to generate the report. The system will display the data based on the filters you selected, giving you a focused view.
-
Review and Export:
- Check out the filtered report on your screen.
- If you need to, you can export the report in formats like PDF or Excel for further analysis or sharing by clicking Export list.
Filtering reports by lists and names improves data management by allowing you to easily highlight and see the most important information to you when you need it.
This helps you to customize your reports with multiple filters to meet your needs. It also provides the convenience of exporting reports in various formats for further analysis or sharing with others on your team.
Customizing Saved Date Ranges
Monitor student behaviour and academic performance with customizable timeframes and quick-select options. Now, you can get the insights you need exactly when you need them.
You can select a specific date range or a number of days on any report and save this selection as a preset for future use.
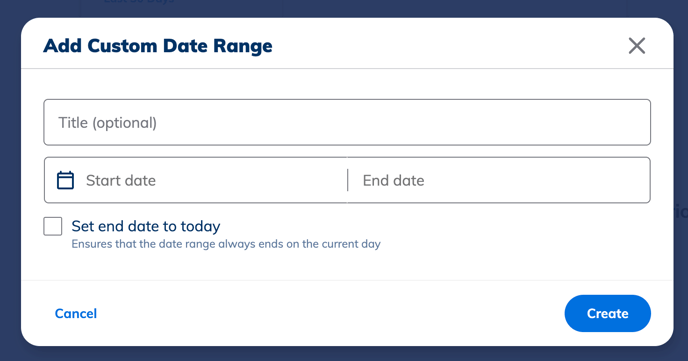
Adding a Custom Date Range:
- Navigate to your Reports tab in the Hall Pass, Behavior, Points or FlexTime sections.

- Click on the "Date Ranges" button.
- Click the "Add Custom Date Range" modal.
- Enter the end date.
- Optionally, check "Set end date to today".
- Add a title.
- Click "Create" to confirm and apply the custom date range.
Reviewing and Editing Date Ranges on Mobile:
-
Access the date range list from the mobile app.
-
Tap on a date range entry to edit.
-
Adjust the start date, end date, or comment as required.
-
Tap "Save" to update the changes.