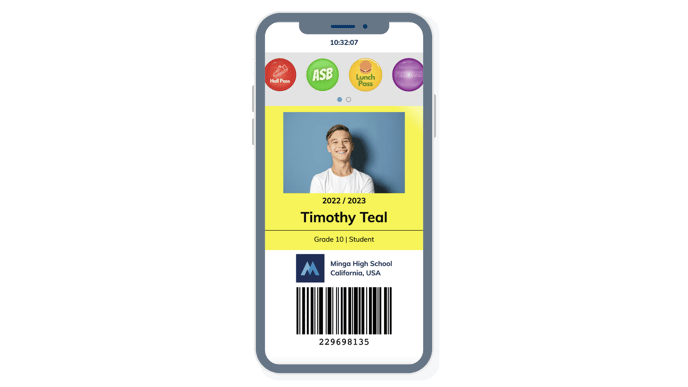
Creating stickers in Minga allows easy assignment of rules and permissions, appearing at the top of school IDs. They can be made from pre-designed or custom options, offering flexibility to identify user groups. For example, schools use them for lunch passes or campus exit permissions.
The process of creating and managing digital ID stickers for users in Minga involves just a few steps, which enable schools to customize student IDs for special access and benefits.
In this article:
- Create a Sticker
- Create a Custom Sticker
- Using Priority to Dictate Sticker Placement on IDs
- Removing Stickers
- No Access Sticker
Create a Sticker
- Select
IDand navigate to theStickerstab - Click
Create Sticker - Choose an included Minga sticker or upload an image of your choice (image will need to be in PNG format with a transparent background)
- Click
Select - Add the sticker name and choose the optional
Priority('0' is the highest priority and will show first on the ID).
💡 You can create as many stickers as you'd like!
Create a custom sticker

- To create your custom sticker, select
IDand navigate to theStickerstab - Click
Create Sticker - Select
Upload Your Ownand attach a PNG or JPG file with a transparent background.
💡 We have created a Canva template you can create a duplicate of here. This template is view-only. If you have a Canva account, you can copy a version to your account. Otherwise, you can download a copy of each sticker in .png format to edit and personalize in an image editor. Canva also has many stickers in its paid library of designs.
Setting Priority Levels
Adding Stickers to Digital IDs
- From the ID Menu, click the
Stickerstab - Click
Addon the sticker - Search for the student or user you wish to add the sticker to by name, ID number or email
- Click the
Addbutton
💡You can also filter your audience and choose based on Group, Grade, or Role within your Minga, which makes it easy to select multiple recipients of a sticker. For example, all students in a particular grade.
- From the ID Menu, click the
Stickerstab - Click
Addon the sticker - Click
Upload file
Adding a No Access Sticker
The "No Access" Sticker is one added to every Minga by default, and cannot be edited or deleted (though the graphic can be customized). It alerts an admin, teacher, or staff member when checking in individuals into an event. When a student has the sticker on their ID, the staff member can then either deny or proceed with access at their discretion. The "No Access" Sticker is great for students whose privileges are limited due to disciplinary actions.

- From the ID Menu, navigate to the
Stickerstab - On the No Access List sticker, click
AddorList Icon - You can search by name, ID number, or email, scan an ID with a camera or barcode scanner, or upload a list for bulk adding the No Access Sticker
- Once you're done, click
Add.
Delete or Deactivate Stickers
Should you ever no longer need a sticker, you have two options. You can either deactivate a sticker from use for an indefinite amount of time (and reactivate when needed again) or you can permanently delete it. A great example of deactivation in practice is an event volunteer sticker for student helpers, only relevant during a certain event, but will likely be used again.

To deactivate a sticker
- From the ID Menu, navigate to the
Stickerstab - Click the
toggleIn the Active column
To permanently delete a sticker
- From the ID Menu, navigate to the
Stickerstab - Click the
Editicon - Click
Delete
View your Stickers in My Tools
You can also view stickers through the My Tools section of the Minga dashboard, ensuring easy access and visibility for both administrators and users.