Permission Level | Owner | Manager | Teacher
Register or Assign Students from FlexTime
Register or Assign Students from MyTools
Automatically Register Students to a Homeroom
Student and Teacher Notifications
Register or Assign Students from FlexTime
Step by Step:
- Navigate to the Activities tab in FlexTime
- Select the date range and Flex Period, and see a list of activities for that Flex Period
- Search by Title (Activity name) to shorten the list
- Click the “Manage Students” icon for that activity.
- Select Register or Assign
.gif?width=670&height=354&name=2025-04-23_16-25-10%20(1).gif)
Register or Assign Students from MyTools
Step by Step:
Through MyTools
1. Go to My Tools
2. Select Assign an Activity
3. Select the Period and the desired Activity, then select Manage Students
4. Select the students you would like to Register or Assign
5. Click Register or Assign
.gif?width=670&height=327&name=2025-06-13_14-17-30%20(1).gif)
Automatically Register Students to a Homeroom
Step by Step:
-
Navigate to the Reports tab in the FlexTime module.
-
Select the FlexTime Unregistered Report.
-
Set your filters:
-
Date range
-
Flex Period
-
(Optional) Filter by User List (e.g., grade, homeroom)
-
-
Select unregistered students.
-
Click Register to Homeroom
- Minga will Check for each student’s homeroom assignment and register them to their homeroom teacher’s activity. If no homeroom or no valid activity exists, assign them to a fallback default activity
-1.gif?width=670&height=320&name=2025-04-22_14-34-14%20(1)-1.gif)
FlexTime Restrictions
Permission Level | Owner | Manager |
By setting up No Party Groups or a No Registration list in the Restrictions tab in FlexTime, Minga will automatically check these lists when a student registers or is assigned and block that student from ineligible activities.
No Party Groups prevent a student in the group from being registered or assigned in an activity with any other student in the same No Party Group.
Students added to the No Registration List cannot self-register, or be registered or assigned to any activity.
Setting up a No Party Group
Step by Step:
1. Navigate to the Restrictions Tab in the FlexTime Module
2. Click on Create Party Group
3. Name your group (a great naming convention is with the initials of the students on the list, this way, you can see at a glance who is in each group)
4. You can also opt to have this No Party Group be active for Hall Passes as well as FlexTime
5. Click Create, and then select the students by typing their name or ID number, uploading a CSV file, or by selecting a Group or User List
.png?width=670&height=393&name=3%20edit%20NPG%20(1).png)
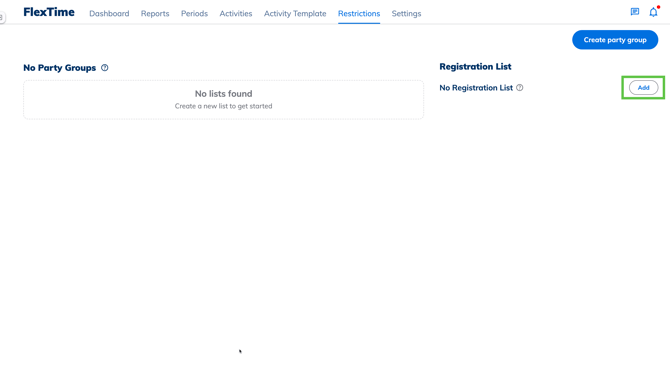
Setting up a No Registration List
Step by Step:
1. Navigate to the Restrictions tab in the FlexTime Module
2. Click on the Add button next to the No Registration List
3. Select students by typing their name or ID number, or by uploading a CSV file, selecting a Group or User List.
Student and Teacher Notifications
Students and teachers will be informed by an instant notification when they cannot register, be registered, or assigned to an activity due to a restriction.
Teachers will see the following when trying to register or assign students who are on the No Registration List or are a member of a No Party Group:
.png?width=670&height=613&name=4%20registration%20summary%20(2).png)
Students will not see an option to register in their MyTools and will be prompted to reach out to a teacher:
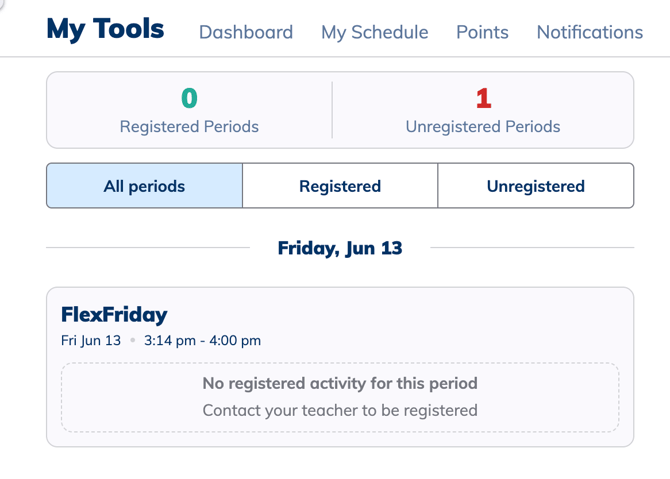
🚨 NOTE:
Teachers do not receive a notification when a student self-registers for a Flex activity or Flex period.
If a student self-registers, teachers will need to check the Flex activity or period roster to view updated student registrations.
Students can view and manage their FlexTime registrations from the FlexTime section of their My Tools page.