Permission Level: Owner | District Manager
MingaSync
MingaSync is our internal rostering infrastructure that allows you to integrate your SIS with Minga- allowing for student, teacher, and class roster information to stay up to date with automatic overnight syncs.
Get Notified of Roster Sync Results
Setting up MingaSync
Step by step:
1. Reach out to the Minga Support team at support@minga.io with the following:
- The name of your district
- The name of the school you are rostering
- The name and email address of the district contact responsible for SIS integrations
2. Enable your SIS for sharing with Minga. For specific instructions per SIS, refer to this article: Enable Permissions in your SIS for MingaSync
3. Fill out the Connection Request sent to you by the support team and email support@minga.io when it is completed. Our integration specialists will then set up your school and push a manual sync to populate your students, teachers, and class rosters.
Configure Sync Settings in Minga
Step by step:
- Navigate to People and then Rostering.
- Scroll until you see the Rostering Settings.
- Enable student, teacher, staff and admin rostering, as well as include Primary Parent Contact Info, by setting the toggle to ON
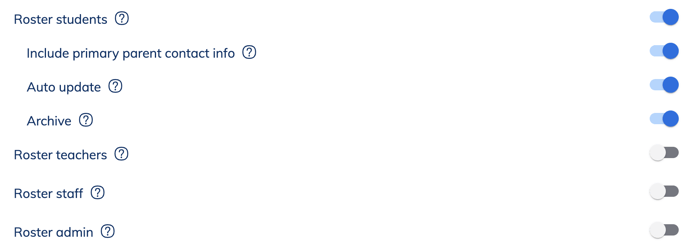
MingaSync will automatically update information for existing users (for example if a student's name was changed in the SIS then their name would be automatically updated in Minga). By default, Minga will skip users who have been manually added. To automatically update their information, toggle ON Auto update.
Minga can also automatically Archive (delete) users that are no longer included in the rostering data (for example, when a student leaves the school) by toggling on Archive.
⚠️ Minga recommends having the Auto update and Archive settings toggled OFF at first until you have verified your rostering is syncing correctly in your Minga. Then toggle them on accordingly to ensure up-to-date rostering.
Configure Class Lists
Automatically pull in your class rosters from your SIS. To do this, sharing permissions by schools or sections needs to be enabled, as well as sharing term data, during the integration.
Step by step:
- Toggle on Sync class rosters as user lists automatically
- Click the Manage button next to Manage class rosters to be synced

- Select Terms for pulling in class lists. *Please Note*: Class Lists will not roster in unless this part is configured.

- Click Save , then Save
To further customize your rostered User Lists, follow these steps:
Step by step:
- Navigate to People and then Settings.
- Select from the following options:
- Make new user lists public by default
- Enable auto-generated lists by role
- Enable auto-generated lists by grade
- Enable auto-generated lists by subject
- Enable auto-generated lists by teacher
Settings that are enabled will allow Minga to automatically create User Lists by the attribute selected and will automatically update in the overnight sync if there are any changes in your SIS.
These settings are toggled OFF by default, but can be toggled ON by an Owner or District Manager.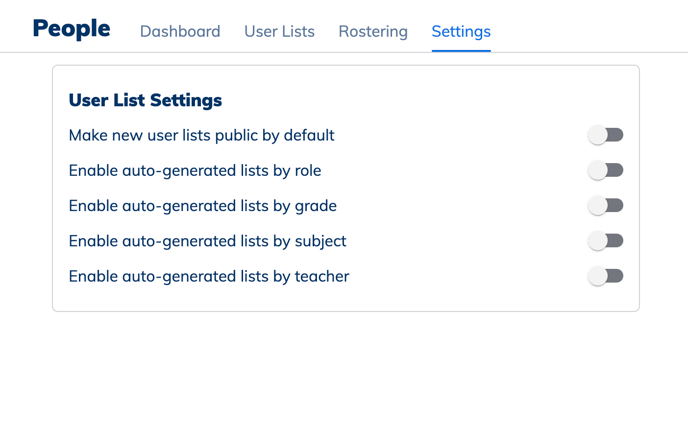
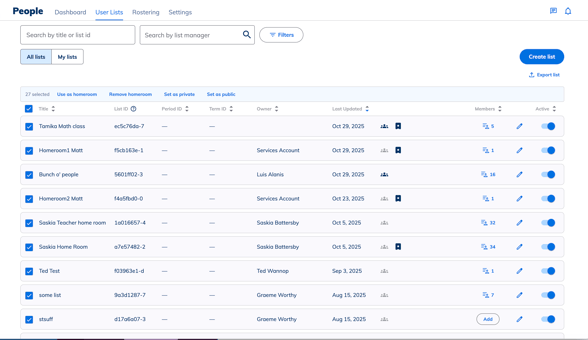
User Lists import as Private by default, meaning that only the List Manager (generally the teacher and co-teachers of the class), Owners, and Managers can view and access the User Lists. However, there may be cases where some User Lists need to be accessed by all staff in Minga. An Owner or District Manager can select multiple User Lists to make them Public so that they can be used in MyClass, by all teachers and staff.
Step by step:
-
Navigate to People.
-
Click on the User Lists tab.
-
Select the lists you want to change the visibility for.
-
Choose either “Set as private” or “Set as public.”
Follow these instructions for checking and editing class lists
Get notified of Roster Sync Results
Owners can set up an email notification with all of the information from the daily roster sync. This will allow technical owners to get assurance that the sync is working or to troubleshoot immediately if any issues are detected.
![]()
Click Save