
Instructions on setting up rostering with ClassLink
Permission Level: Owner | District Manager
For more information on working with ClassLink, please refer to the ClassLink Help Site Article here.
💡 Please note: Minga recommends having the Auto update and Archive settings toggled off at first until you have verified your rostering is syncing correctly in your Minga. Then toggle them on accordingly to ensure up-to-date rostering.
Step One: Adding Minga as a Roster Server Application
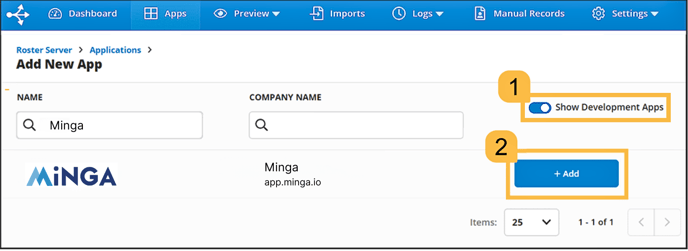
Click the Apps tab, then click + ADD.
Toggle on Show Development Apps, search for Minga, then click the + Add button for the app(s) you want to add.
Step Two: Roster Server Application Permissions
With your app(s) added, it's time to define vendor permissions. Permissions specify how much access the vendor can have to your data for app account provisioning. Select Full Permissions, or alternatively you can select Rule Based Permissions if you are comfortable with setting ClassLink permissions.
💡 Please note: With rule based permissions you will have to enable sharing Classes and Courses, Parent or Guardian info, Student ID, Grade, Name, and Email in order for Minga to work effectively.
.png?width=688&height=284&name=Minga%20(2).png)
Step 3: Notifying Minga
After you've added the Roster Server application and set the app's permissions in your console, notify Minga at support@minga.io and we will locate the required information in the ClassLink Partner Portal to finish setting up automatic rostering in your school's Minga.
Step 4: Finish Configuring in Minga
Update Minga Sync Settings
Once Minga has confirmed automatic rostering is set up it is time to update your Sync Settings.
Log into Minga at app.minga.io, go the People and click on the Rostering tab.
You can enable student, teacher, staff and admin rostering separately as well as include Primary Parent Contact Info depending on what data you want to synchronize in Minga.
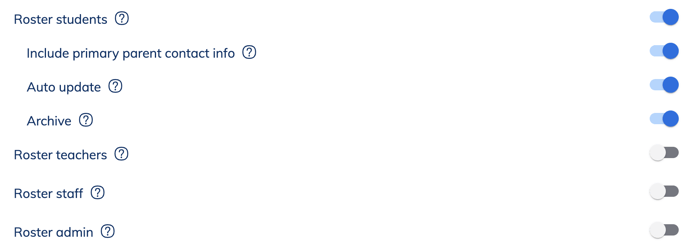
Minga can automatically update information for existing users (for example if a student's name was changed in the SIS then their name would be automatically updated in Minga). By default, Minga will Skip users that are already setup in Minga. To automatically update their information toggle on Auto update.
Minga can also automatically Archive (delete) users that are no longer included in the rostering data (for example when a student leaves the school) by toggling on Archive.
Configure Class Lists
💡Please note: Full Sharing Permissions or class and courses for Custom Permissions need to be enabled during the OneRoster integration in order to pull Class Lists into Minga.
- Toggle On Sync class rosters as user lists automatically
- Click the Manage button next to Manage class rosters to be synced

- Select Terms and Grades for pulling in class lists. *Please Note*: Class Lists will not roster in unless this part is configured.

- Click Save
Follow these instructions for checking and editing class lists
Get notified of roster sync results
Owners can set up an email notification with all of the information from the daily roster sync. This will allow technical owners to get assurance that the sync is working or to troubleshoot immediately if any issues are detected.

Click Save
